Imagine the smell of rain hitting dry pavement mixed with the clean, grassy scent of unwashed flax. That is the aroma of high quality linen. When you run your thumb across the surface, you feel that signature slubby texture; it is the result of varying fiber thicknesses that give the fabric its organic soul. We are diving deep into the world of Patchwork Linen Pillows today. These are not your grandmother's stiff cushions. We are talking about soft, muted tones like oatmeal, dusty sage, and charcoal, all coming together in a structural masterpiece. Linen possesses a high tensile strength but low elasticity, which means every stitch we set is a permanent commitment to the form. It is the ultimate material for a maker who appreciates the friction of a natural weave. We are going to take eight humble scraps and transform them into a tactile sanctuary. Grab your coffee and clear the workbench; we are about to turn raw botanical fibers into high end interior design through the power of geometric precision and material physics.
THE STUDIO KIT
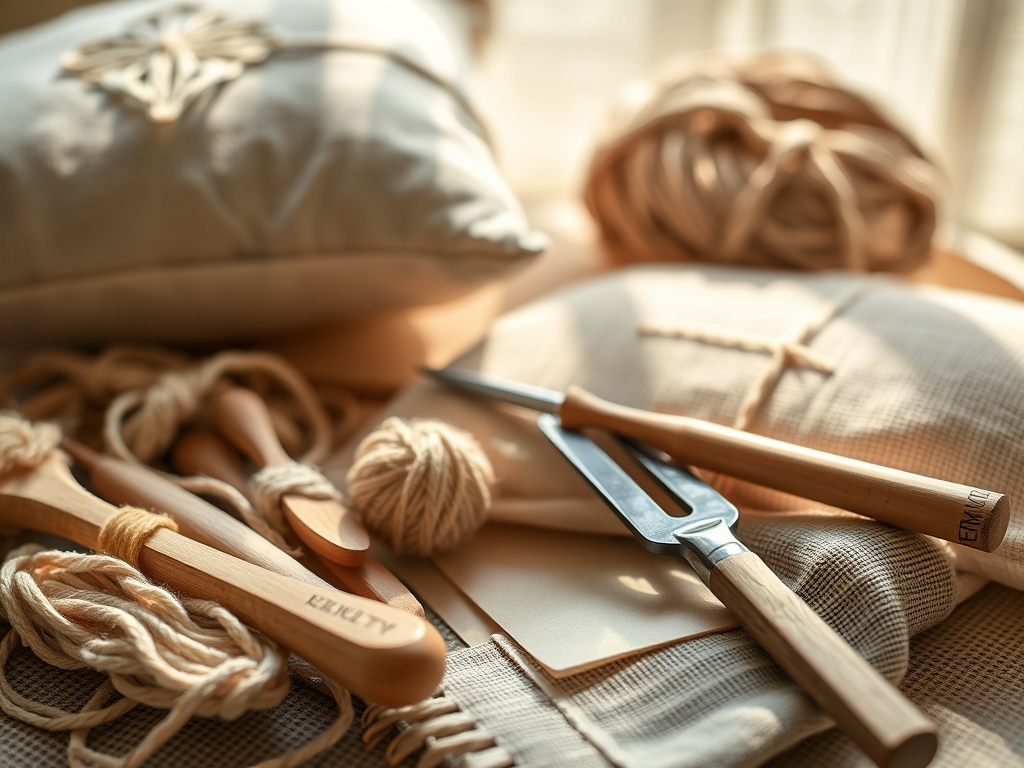
To master Patchwork Linen Pillows, you need more than just a needle and thread; you need an arsenal that respects the porous nature of the textile. Start with a high quality rotary cutter featuring a 45mm tungsten carbide blade. Because linen fibers are prone to shifting, a standard pair of scissors often causes "fabric creep," where the top layer moves faster than the bottom. You will also need a self healing cutting mat with a precise grid for squaring your scraps. For the marking phase, use a fine point tailor's chalk or a ceramic lead pencil; these allow for crisp lines without bleeding into the weave.
Your thread choice is critical. Opt for a 50 weight cotton or a high strength polyester core thread. Linen is a heavy hitter, and you need a thread that matches its ply and durability. A bone folder is an underrated hero here; use it to crisp your seams before hitting them with the iron. For material substitutions, if you cannot find pure flax linen, a linen cotton blend (often called Essex linen) offers a similar aesthetic with slightly more stability due to the cotton's tighter gauge. If you are feeling adventurous, hemp scraps provide even higher durability and a beautiful, rugged drape that softens significantly over time.
THE TEMPO
The "Maker's Rhythm" is all about respecting the transition from raw state to finished product. This project requires approximately four to five hours of focused studio time. The first hour is the Curation Phase. This is where you test the color theory of your eight scraps and check the grain direction of each piece. Never rush this; the way light hits the weave determines the final "glow" of the pillow.
The second and third hours comprise the Assembly Phase. This is the most technical part, requiring a steady cadence at the sewing machine. You are managing seam allowances and ensuring that the intersections of your patchwork are mathematically sound. The final hour is the Finishing Phase, involving the insertion of the pillow form and the final hand stitched closure. Remember, linen is a "living" fabric; it responds to the humidity in your studio. If the air is too dry, the fibers become brittle. Aim for a moderate environment to keep the textile supple as you work.
THE CORE METHOD
1. The Dimensional Harvest
Start by squaring your eight scraps using your rotary cutter and a transparent acrylic ruler. For a standard 18 inch pillow, you will want to cut your scraps into varying rectangular or square sizes that aggregate to 19 inches (allowing for a half inch seam allowance on all sides).
Mastery Tip: Always align your cuts with the warp and weft of the fabric. Linen has a distinct grainline; if you cut on the bias (diagonally), the fabric will stretch and distort under the weight of the pillow insert, ruining the structural integrity of the piece.
2. The Strategic Layout
Arrange your pieces on a flat surface. Look for a balance of "weights." Place darker, more densely woven scraps toward the bottom or center to ground the design. This is where you consider the tactile hierarchy of the muted tones.
Mastery Tip: Use the "squint test" to check the value distribution. By blurring your vision, you can see if one scrap is visually "heavy" and pulling the eye away from the overall harmony of the Patchwork Linen Pillows.
3. Precision Seaming
Pin your first two scraps right sides together. Use a walking foot on your sewing machine if possible. This attachment ensures that the top and bottom layers of linen move through the feed dogs at the exact same rate, preventing the "puckering" often seen in amateur patchwork.
Mastery Tip: Maintain a consistent 1/4 inch seam allowance. In physics, even a millimeter of deviation can compound over several seams, leading to a finished cover that is skewed rather than square.
4. The Heat Treatment
After sewing each seam, move to the ironing board. Press the seam "as sewn" first to set the stitches into the fibers, then press the seam allowances open.
Mastery Tip: This process utilizes capillary action to draw the thread deeper into the weave. Pressing open reduces bulk at the intersections, ensuring that the finished pillow lays flat and the corners remain sharp.
5. Squaring the Face
Once all eight scraps are joined into a single panel, use your large square ruler to "trim to size." This ensures that any minor shifting during the sewing process is corrected before you attach the backing.
Mastery Tip: Use a caliper to check the thickness of your seams. If one area is significantly thicker, it will create a "pressure point" that can cause the fabric to wear out faster in that specific spot.
6. The Envelope Backing
Cut two pieces of linen for the back, each measuring the width of the pillow but only two thirds of the height. Hem one long edge of each. Overlap them to create an "envelope" closure. This eliminates the need for zippers, which can be a point of mechanical failure.
Mastery Tip: The overlap should be at least 4 inches. This creates enough surface tension to keep the pillow form hidden even when someone is leaning against it.
7. The Final Union
Place your patchwork front and your envelope back right sides together. Pin excessively. Sew around the entire perimeter, reinforcing the corners with a backstitch.
Mastery Tip: Trim the corners diagonally, being careful not to clip the stitches. This removes excess bulk, allowing the corner to turn out into a perfect 90 degree angle.
8. The Burnished Finish
Turn the pillow right side out and use a bone folder or a wooden turner to gently poke out the corners. Give the entire piece a final steam press.
Mastery Tip: Steam relaxes the hydrogen bonds in the flax fibers, allowing the patchwork to "settle" into its new shape. This is the secret to that professional, high end boutique look.
THE TECHNICAL LEDGER
Maintenance & Longevity
Linen is incredibly durable but hates harsh chemicals. To maintain your Patchwork Linen Pillows, spot clean with a pH neutral detergent. If you must machine wash, use a cold, delicate cycle and air dry. Over time, the linen will develop a "patina" of softness as the pectin in the fibers breaks down.
Material Variations
- Sustainable: Use Oeko-Tex certified linen to ensure no harmful substances were used in the retting process.
- Recycled: Repurpose old linen curtains or tablecloths; these often have a superior "hand" because they have been laundered hundreds of times.
- Premium: Look for Belgian or Irish linen, which features longer staples and higher tensile strength.
The Correction: Common Pitfalls
- The Ripple Effect: If your seams are wavy, your tension is too high. Decrease the upper thread tension on your machine.
- Fraying Edges: Linen frays aggressively. Use a serger or a zigzag stitch on all raw edges before assembly to preserve the structural integrity.
- The "Slouch": If the pillow looks deflated, your insert is too small. Always use an insert that is 2 inches larger than your pillow cover for a plump, professional look.
Studio Organization
Store your linen scraps flat in a climate controlled environment. Avoid plastic bins, which can trap moisture and lead to mildew in porous natural fibers. Use acid free tissue paper between darker colors to prevent "crocking" or dye transfer.
THE FINAL REVEAL
Look at that! You have successfully navigated the physics of flax. Your Patchwork Linen Pillows should feel substantial yet soft, with seams that are as straight as a laser line. The muted tones work together because you respected the grain and the value of each scrap. When you toss these onto a sofa, they do not just sit there; they command the space with their organic texture and artisanal soul. You have taken "trash" scraps and turned them into a masterclass in textile engineering. Go ahead, give them a squeeze. That resistance you feel? That is the perfect marriage of high quality fill and expert construction.
STUDIO QUESTIONS
What is the best way to prevent linen from fraying during sewing?
Apply a thin line of fray check to edges or use a serger to overcast the raw sides. This locks the loose weave in place before you begin the high friction process of machine stitching.
Can I mix different weights of linen in one pillow?
Yes, but be careful. Heavy upholstery linen joined to handkerchief linen can cause the lighter fabric to tear at the seam. Always reinforce the lighter fabric with a fusible interfacing to match the heavier weight's stability.
Why does my patchwork look crooked even though I measured correctly?
You likely ignored the grain direction. If one scrap is cut on the grain and the adjacent one is slightly off, they will pull against each other, causing the entire panel to warp under tension.
How do I get the "muted" look if my scraps are too bright?
You can "over dye" your scraps using a weak solution of tea or grey fabric dye. This lowers the chroma of the fibers, giving them that sophisticated, weathered aesthetic typical of high end linen decor.